|
|
|
|
Working with the Sun
The sun is the source of all natural light in your scene. Its attributes have a profound effect on the look of your scene.
The color of the sun affects all the colors of all the objects in the scene; Sunlight color tints all the other visible colors.
The position of the sun controls the time of day in your scene. If the sun is above the horizon, it is day; if it is below, it is night, and if it is at the horizon, it is sunrise or sunset.
The sun can be animated just like all the other elements of your Bryce scene. You can create time-elapsed effects by changing the position of the sun over the course of an animation. Refer to "Animating Sun or Moon Position" for more on animating the Sun.
Positioning the Sun
The sun position control sets the direction your natural light is coming from whether it is sunlight or moonlight. The position can be set using the Sun control in the Sky & Fog palette. The control works like a trackball, with the sun at one end and the moon at the other.
The control works like a trackball. As you drag over the control, both elements move in the direction you drag.
You can think of the control as a compass: if the highlight on the Sun Control sphere is positioned at 12 o'clock, the light comes from the north, and so on.
The colors in your sky will change depending on the position of the Sun Control, or the "time of day..." just like in the real world.
The angle of the shadows changes as the sun changes. If your object is shiny, and there are no other light sources, the position of the sun controls where the highlight appears.
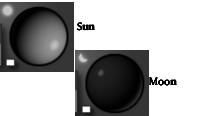
Day and Night
Your sky normally contains two bodies: the sun and the moon. There is always one body visible in your sky. At night it is the moon and in the day it is the sun.
The two bodies are connected and always remain at opposite ends of the sky. As you move the sun you're also moving the moon. This means that when the sun dips below the horizon in front of you, the moon is rising behind you.
To switch between night and day:
1 Display the Sky & Fog palette.
2 Click the Day/Night toggle button in the top-left corner of the sun position controls.
Sunrise/Sunset
You can create a sunset or sunrise by positioning the sun so that it is visible on your horizon.
You can position the sun manually by using the Sun/Moon control, or numerically by specifying values in the Sky Lab. You can also position the sun exactly where you want it to appear in your scene.
The colors in the sky automatically change to create the illusion of the sunrise or sunset colors. You can also use the Sky Dome color to give your sunset/sunrise added color.
For a more realistic sunset you may want to link the fog and haze to the sun so that they react to the sun color as it approaches the horizon. Refer to "Blending the Fog Color" and "Blending the Haze color with the Sun" for more on this feature.
You may also want to enable the Horizon illusion for the sun. This feature makes the sun appear larger as it approaches the horizon. Refer to "Sun/Moon Horizon Illusion" for more on this effect.
To position the sun manually:
1 Display the Sky & Fog palette by clicking the Sky & Fog button at the top of the Bryce window.
2 Drag the larger highlight area in the Sun Position controls to the position where you want the light to originate.
You can position the sun, or the moon, on the horizon as you like by nudging the Sun Control until the light is visible in your scene.
To position the sun numerically:
1 Display the Sky & Fog palette by clicking the Sky & Fog button at the top of the Bryce window.
2 Click the Sky Lab button. The Sky Lab palette appears
4 In the Sun Controls area, type a value into the Azimuth field. The Azimuth field controls the east-to-west position of the sun. The range is 0 to +360.
5 Enter a value in to the Altitude field. The Y field controls the height of the sun relative to your scene. The range is -90 to +90.
Positive values are above the horizon, negative values below.
To position the sun with precision:
1 Display the Sky & Fog palette by clicking the Sky & Fog button at the top of the Bryce window.
2 Hold down Control+Option/Ctrl+Alt, and double-click the Sun control.
3 Hold down Control+Option/Ctrl+Alt, and in the working window, click where you want to position the sun.
Linking the Sun to the Camera
Normally, you'd have to reposition the sun every time you changed the camera to maintain a certain effect or sunlight angle. However, if you apply the Link Sun to Camera, your sun will track the camera. The position of the sun relative to the camera remains the same no matter where the camera is positioned. This way you can set up the sun position once and then not worry about losing the effect as you move the camera.
This feature can also be very useful when you're animating your scene. Refer to "Animating" for more.
To link the sun to the camera:
1 Display the Sky & Fog palette by clicking the Sky & Fog text button.
2 Click the Sky Lab button. The Sky Lab palette appears.
4 Click the Link Sun to View button.
When this option is enabled, your sun will always remain in the same position relative to the camera. Wherever you move the camera the sun will follow. This is an easy way of seeing how a sunset will look against different skylines.
Sun Color
Light in nature is not usually visible until it strikes an object. When you're using normal light, a purple sunlight color will not paint your entire sky purple, but objects in your scene will reflect purple.
When you're using Visible World, choosing purple will paint your entire scene purple.
The grayscale bar at the bottom of the color palette lets you set the intensity of the sun. Black turns the sun off and white sets the sun to its brightest intensity.
To set the Sun Color:
1 Display the Sky & Fog palette by clicking the Sky & Fog text button.
2 Click the Sun Color swatch, and choose a color from the color picker.
Disabling the sunlight
You can remove the sunlight in your scene by disabling it. When the sunlight is disabled, the sun remains in the scene, but does not throw light. The only light visible in your scene comes from individual light sources. (The scene will still be illuminated.)
To disable the sunlight:
1 Display the Sky & Fog palette by clicking the Sky & Fog text button.
 Corel Corporation http://www.corel.com Voice: (800) 772-6735 Fax: (716) 447-7366 www.corel.com/support |